GearToons

Hiking gear reviews for hikers with short attention spans.


1 Comment

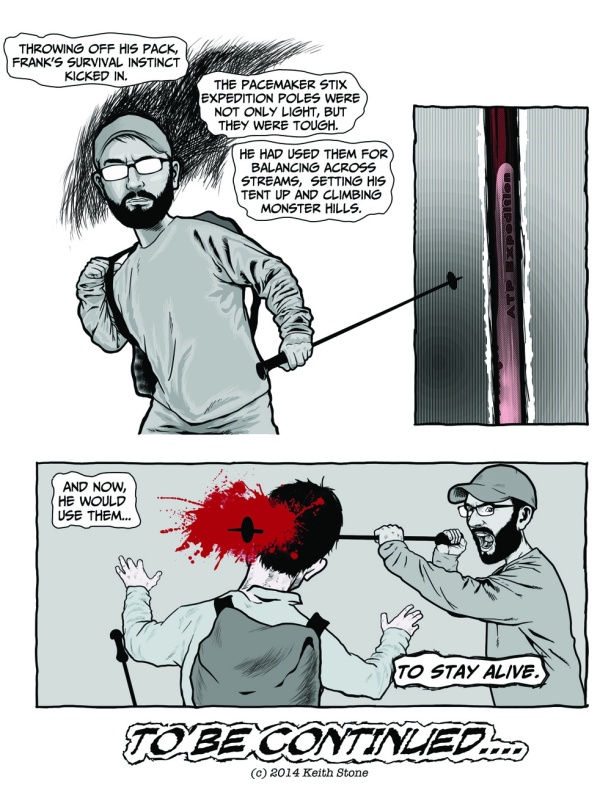
The Hiking Dead: Pacemaker Stix Expedition poles


thd-page-01

thd-page-02-final-smallthd-page-03thd-page-04-final-small


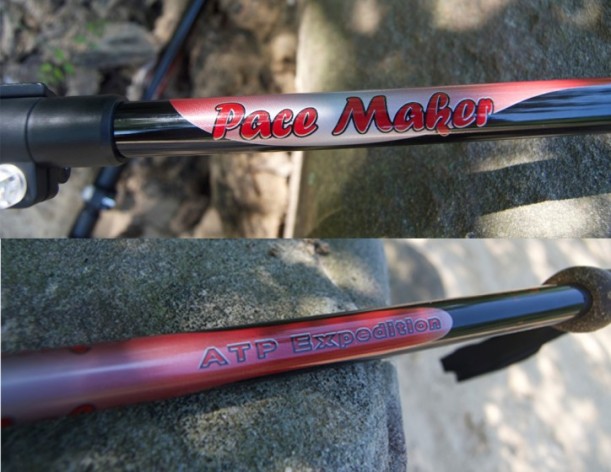
A few weeks ago, I received a pretty rad little package in the mail from Brian at Pacemaker Stix. Inside was a pair of their Expedition trekking poles. This has been a busy time of year for me, but I finally managed to find a time to get out in the woods and put them to use.pm00
 

I used to hike without poles, but after I started backpacking (instead of only dayhiking) and carrying heavy stuff on my back, I noticed how quickly my knees started to ache when tackling hills. So, I started using poles and quickly saw the benefits of them. Now, I never hike without them.

My first pair was some cheapo poles I bought at Walmart. After one of them failed and nearly sent me toppling over a steep bluff, I got something a little better. I picked up some Mountainsmith poles that I’ve been using for a while and never had a problem with. They were kinda heavy, though, and were the ‘twist lock’ type of poles. These Expedition poles have a great feel to them and seem to be a much higher quality product, based on my initial impression, which was very positive.

Also, Pacemaker Stix is a US-based company, which I really love. They stand behind their product with a one year ‘Tip to Grip’ guarantee and include replacement accessories with every pole order. At the time this review is being written, they offer free shipping on orders of $50 0r more.

These are the ‘flick lock’ type, which are really quick and easy to adjust the length with, which I can appreciate. These telescope from 27 inches out to 54 inches.

pm001


One thing I like about the Expedition pole is the weight. Only 10.5 ounces per pole.  The shaft is constructed of aircraft grade 7075 aluminum. The cork grips  are ergonomically designed and comfortable and I like them better than a molded plastic or rubber handle, personally. I usually take the straps off of my poles because I don’t really use them much. Anybody else do that?

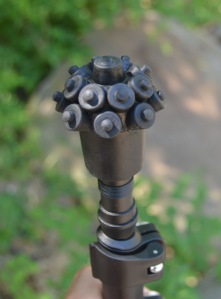
The tips are tungsten steel with a removable vulcanized rubber boot. Mine came with an alternate set of boots that look really weird, but help to grip the ground even better. ( They kinda remind me of that strange looking monster that appears to Freck in ‘A Scanner Darkly’, with all the eyes on his head. You’ve seen that, right? )

pm8

Also, there are two different baskets you can attach, a small one and a larger one, that are much easier to detach and reattach than other ones I’ve messed with. Rather than slipping the basket on, then twisting it into a locked position, like my other poles, you can just push them on and they are held in place by three little ridges. I really like this, because I can easily take them off when I use my trekking poles to support my tent.  I normally don’t put the baskets on my poles unless I know I’m going to be stomping through water or mud, but since they are easy to take on and off, I’ll probably keep them on now.

pm002

I try to cut weight where I can , and had tossed around the idea of going with some UL poles like those made by Gossamer Gear. However, I have read more than a few reviews that mention how they are somewhat easy to snap if you are rough on them or fall on them…which I am prone to do. So, I believe I’ll stick with these.  After a few uses, they have been durable and dependable. As with anything, time will tell how well they stand up to use and abuse, but these poles feel anything but cheap to me.   And, should I ever need to dispatch zombies that I meet on the trail, perhaps they will keep me alive.

Disclaimer thingy: Pacemaker Stix provided me with a set of Expedition trekking poles to review with no obligation. They didn’t ask me to say positive things about their product, nor did I promise them I would. My thoughts expressed in this review are my own opinions. Have a nice day.


About ‘The Hiking Dead’ comic….

First of all, let me say that these poles are to never, ever, ever be used to as a weapon against any living thing. Or dead thing for that matter. Okay?

I really wanted to have some fun with this GearToon, so I drew myself into a TWD style comic. I probably spent close to 20  hours on this one. A lot of it was experimenting and goofing off, but I’m happy with the way it turned out. I’d like to do another one like this but will probably wait and see how the response is. There’s no feeling quite like working on something for a week and getting a lukewarm response to it. So, if you enjoyed the comic and would like to see ‘Part Two’, send me some feedback. As always, thanks for reading my blog.


1 Comment

The Hiking Dead (or ‘How I Spend My Downtime Lately’)

THD-FINAL

A couple of weeks ago, I hurt my foot while on a Sunday afternoon run. (Turns out, my Vibram FiveFinger running shoes are mighty comfy for running but offer very little protection from smashing your foot on harder-than-diamonds sidewalks.) So, I went to the doctor and found out that I had a contusion on my tarsals (or was it my metatarsals? I get those mixed up so often) which means no running or hiking for several weeks. Needless to say, I was pretty bummed. Especially since the weather has been really nice lately and, therefore, perfect for hiking.

I’ve been spending my weekends sitting inside with my foot in a cast, propped up, and sitting on the couch. Which kinda sucks.
However, I’ve been using my time to brush up on some of my artistry and whatnot, so I guess there’s a silver lining to that cloud. So, blah blah blah, here’s a piece I finished recently. My plan was to do a comic strip with a ‘The Walking Dead’ theme, since it’s my favorite show in the whole universe. I am still gonna work on it when I can because I think it’s a fun idea and I’d really like to finish it, if I can.

So here is the cover to a fake ‘The Hiking Dead’ comic I did last weekend. This probably took at least eight hours or so to finish, because it was an experimental piece. I tried things out to see if they worked, and if I didn’t like how it looked, I’d delete it and start over. It’s a sheer miracle that I didn’t get bored with it and move on to something else. I tried out using halftones and experimented with blending colors rather than leaving hard borders on contrasting colors. I put a whole lot of bloody gore in there at one point, but when I had finished it all up, I decided that it was a bit over-the-top and took it out. Also, I didn’t want to spend hours working on my coloring, only to cover it up with a layer of bright red splatters.

So, anyway, here it is. Comments welcome.


FYI: For those who don’t know, Keith Stone and  Frank Patriot are the same person. (Me.) Frank is a pseudonym I use(d) when drawing comic.


1 Comment

Eagle Creek Pack-It Sac

packitsac01

I found the Eagle Creek Specter Pack-it Sac on Steepandcheap.com a few weeks ago at a bargain basement price. I already had the Pack-it Specter Quik Trip, which you may have read about on Brian’s Backpacking Blog a while back. (That’s where I saw it, too.). I really liked it and have used it both for backpacking trips as well as business trips, so when I found the Pack-it Sac (hereafter referred to as the ‘Sac’), I grabbed it up.

The Sac weighs barely over a half ounce (0.6oz) and measures 10” x 8” and is constructed of Ripstop Silnylon. I know that this is several times heavier than a quart sized ziploc bag, which is normally what I use, but this is a bit more durable and not very transparent. (If you are carrying along something potentially embarrassing, like anti-foot fungus cream, you may not want other folks in your group to see what all is in your personal items bag. Not that I have foot fungus, mind you. I’m just trying to get my point across. I swear.)

packitsac00

The Sac has a zipper with a small pull cord to help you open it up easier in  case you’ve got gloves on.  Also, there’s a plastic spring carabiner on a swivel that’s handy. However, you could cut this off and save a fraction of an ounce or replace it with something lighter and smaller, I suppose. Since the whole thing weighs barely over a half ounce, I haven’t bothered to replace the carabiner, which I like having on there.

packitsac02

I used the Sac to pack my first aid kit, toiletries, wallet and a few other things in. I’ve also used my Pack-it Quick Trip for this purpose and had room to spare. ( If you like having zippered compartments, the Specter may be better suited for you. ) I liked being able to clip the Sac onto my backpack, so unless I can’t stuff all my things into it and need more room, I’ll continue to use this and leave the ziploc bags for freezer bag cooking.


Leave a comment

The (Long Distance) Walking Dead papertoy: ‘Caboose’

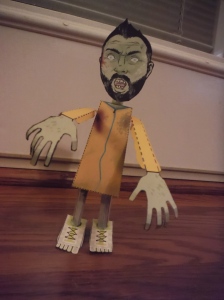
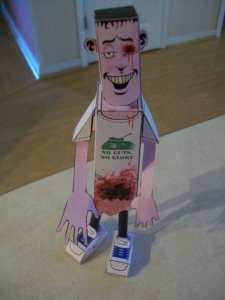
Okay, so maybe I’m a little narcissistic, but I just had to make myself into a papertoy. I thought I’d make it just a little different, though. The Walking Dead is my favorite tv show, so I thought I’d make myself into a ‘walker’. Why? Because, I like to think that in a zombie apocalypse, I’d be one of the gang holed up with Rick and Daryl; packing double .45’s like a character in a John Woo movie, leveling zombies left and right and storming into Woodbury shooting up the place like the Wild Bunch. But honestly, I’d probably be just another hungry rotting corpse stumbling through the woods in my Marmot jacket and FiveFinger shoes. So, that’s exactly how I drew myself.

DSCF2459DSCF2463

So anyway, Here’s the template. We’ll call this the “Caboose'”. My trail name is ‘Caboose’, appointed to me by myself, quite accurately because I am usually at the end of the line of hikers in the group.

This papertoy is an older design that I did a while back and it’s just slightly more advanced than the last one I designed.

zombieszombie lower suit

Here’s the PDF files:  LDWD Page One  LDWD Page Two

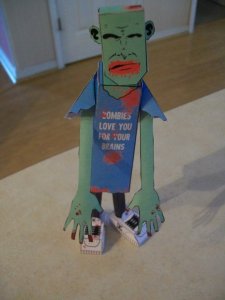
Just for funsies, these are some ‘Desk Zombie’ paper toys I’ve also designed.

z5 z4 z3 z2 z1

Note: All the paperboys seen here are copyrighted material and property of Keith Stone, so don’t try to sell these or make a buck of someone else’s work. Print and use these for personal use all you want, but if you share or post it somewhere else, be sure to credit Keith Stone or GearToons blog as the original author.


Leave a comment

The Official Limited Edition Brian Green Papertoy

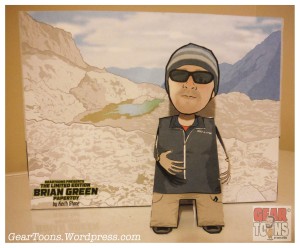
brianpapertoyOkay, this thing has gotten quite a few positive comments since I posted it on Facebook, so I thought I’d post the template so you guys can print out and assemble your very own Brian Green papertoy. Carry him wherever you go!

It’s so small, I probably wasted the time it took to draw the knife clipped in Brian’s pocket because you can barely see it, but I just get excited about putting in little details (even if I’m the only person who knows). However, there is an iPhone on his side (visible in the template below) and I tried to draw the Suunto and Fitbit on his wrists. (I told you I enjoy details.)

I should have created his sidekick, Coco the Hiking Dog, but I had a hard time finding an appropriate dog papertoy template online. Perhaps that will be part of the BG 2.0 Playset released just in time for Christmas 2014? 😉 Kidding.

For those who haven’t noticed, this is a 3D representation of Brian’s profile pic on the Brian’s Backpacking Blog Facebook page. 

brian-papertoy-aaa

And here’s the templates in PDF format, both the figure model and the background picture display.

brian-papertoy00 (Figure)

brian-papertoy01 (Background Display)

I know a paper toy model isn’t normally what you expect to see on an ‘outdoor blog’, but when I started GearToons, I decided that I wanted to do something unique and looked at hiking and backpacking from my perspective in life and included the things I love, like art, comics and humor. I plan to continue doing my little blog thing here as long as I’m having a good time and everyone else is, too.

BTW, if any of you are interested in commissioning a personalized papertoy for yourself, email me at geartoonblog@gmail.com or PM me at the GearToons Facebook page.

Thanks  for following GearToons.


Leave a comment

Borah Gear Stuff Sacks

Just a quick post here about stuff sacks. I know it may be odd to see a blog post about stuff sacks, but when I find a good deal on something, I want to share it with others. Is that so wrong???

borah02

So, anyway, I picked up two Borah Gear cuben fiber stuff sacks about a week ago from Borahgear.com. I got a Small (4″ x 8″/1.5 grams/ $4.50) and a Large (6″ x 12″/3 grams/ $5.50) for only $10, shipping included. They make stuff sacks in cuben fiber, silnylon and no-see-um mesh. The silnylon and mesh stuff sacks are cheaper ($3.25 for small, $4.00 for large) but weigh more. I was surprised to find the cuben fiber sacks priced so low, since similarly priced CF stuff sacks are at least twice that on other sites. The seams are double stitched and are not waterproof, just so you know. Also, the bottoms are flat.  The drawcord is nylon and pretty thick. It’d be great if they came with a cord lock, but fortunately,  I had a couple medium sized ones I bought from Zpacks a while back. I slipped one on and it worked great.

borah03

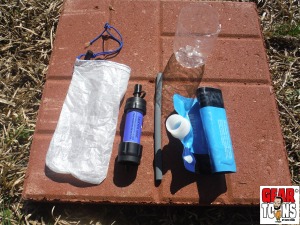
I was able to squeeze my Sawyer mini filter kit (seated inside a cut down water bottle) into the small bag.

borah04

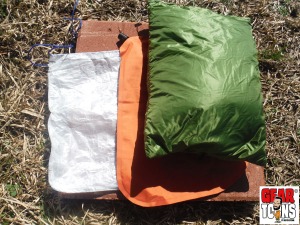
And I decided to store my Goosefeet Gear medium down pillowcase and small NeoAir pillow into the large one. I’m sure I could have stuffed more down into it, but I didn’t want to compress the pillowcase too small.

I inquired about custom sizes, since I wanted something smaller than the 4″ x 8″ small sack, to use as a bag for my Ti tent stakes and also something that would fit my cook kit a little better, since the large size was just a little too tight. They told me ‘Custom sizes? No problem!’ So, once I figure out exactly what dimensions I want, I’ll place an order.

So, anyway, to sum up this invigorating review of stuff sacks: They’re dirt cheap and they seem to be made well.


Leave a comment

Contest rules (plus the Papertoy “Stick” template)

I’m  running a contest on the GearToons Facebook page in which I’m giving away not only a sweet Epicurean Titanium solid fuel stove from Flat Cat Gear, but also a custom papertoy. (The contest runs from Feb.24-March 3, 2014). If you’re curious what a papertoy is, its just a modernized form of origami. I love to draw just as much as I love to hike, so when I’m not outdoors, I’m sitting in front of a Macbook and Wacom tablet.

CONTEST INFO

All that’s required to be entered to win is go the GearToons Facebook page, then LIKE and SHARE this picture: contest-papertoy

In order to get a good likeness for the papertoy, the winner will need to email me at least two good (read: not grainy or pixelated) pictures of their face. I use a combination of rotoscoping and plain ol’ comic book inking techniques to draw these, so a good photo is critical. To receive the papertoy, I will either email it to the winner, so they will be able to print it out on their own choice of paper and assemble it themselves OR the papertoy will be printed on thick card stock paper, assembled by me and mailed to the winner.

IMPORTANT: Continental US mail delivery only for the prizes. Sorry. Please don’t hate me. If you have any questions, just ask.

To get a better idea of what the custom papertoy will kind of like, here’s a picture of one I did for my buddy Chad (“Stick” of Stick’s Blog) recently. I used the logo I did for him a while back, as a foundation.

stickpapertoy00

Designed in Photoshop & Illustrator. Printed on card stock paper. Stands about 5″ tall.

stickpapertoy01

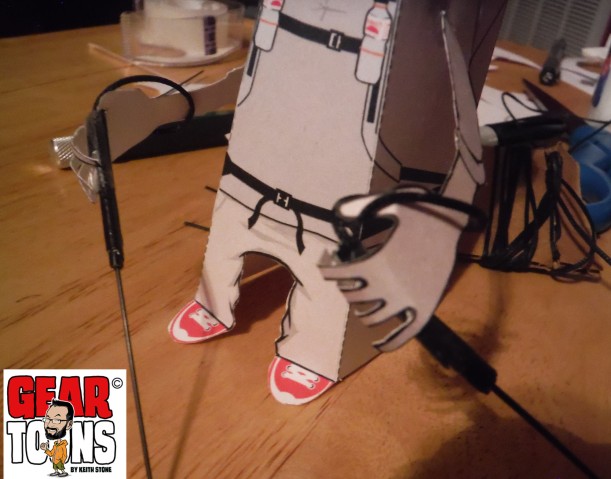
The trekking poles are made from bristles from my kitchen broom, tiny strips of duct tape (for the handles) and polyester cord I got from Zpacks.

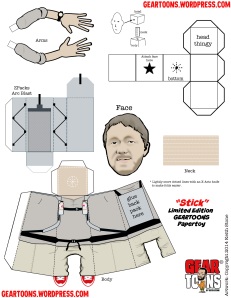
If you like the ‘Stick papertoy’ above and want to print and assemble your own, click on the image below or download the template in PDF format here: ===> stick-papertoy-rev1.

stick-papertoy-rev1

COMMISSIONS

If you are interested in having me design a personalized papertoy for you, email me about doing a commission. Or I’ll draw you a personalized comic. Heck, I’ll draw you as a pink Sasquatch beating up Spiderman, if you want. Give me a holla @ geartoonblog@gmail.com.

-Keith


Leave a comment

Joby GorillaTorch Switchback

gor-page

Is the Joby Gorillatorch Switchback an alien hunter/killer robot from another world?

No, it’s not. It just looks like an extra-terrestrial weapon of mass human extermination.

I’ve had this little gadget for over a year and have taken (most of) it on every backpacking trip.  I say ‘most of it’ because it actually is three separate pieces:

joby-c

joby2

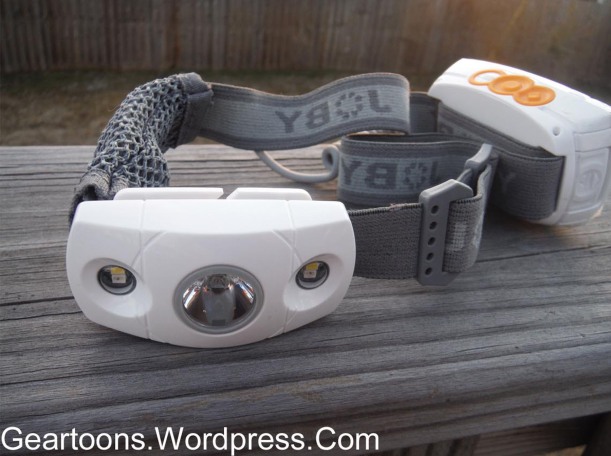
Firstly, the piece that I use the most is the headlamp. The elastic headband is adjustable and fits even an oversized melon like mine. Also, the lamp tilts downward so you don’t get neck cramps from looking down while you read or write in your journal before bedtime. The headlamp has 5 LEDs, one powerful ultra-bright light in the center (130 lumens), and two on each side – two soft white flood lights (14 lumens) and two red lights (3 lumens) to help with your night vision. (The red lights could cause you to be mistaken for a Jawa, I should point out. )The center light has a high beam which will dim just a bit with the push of a button. The two flood lights provide just enough light for me to fix dinner in the dark and eat without draining the batteries and, in my opinion, is the best choice if I’m just sitting around talking. The ultra bright spotlight is a great tool for night hiking but will blind everybody you look at. It uses two AA batteries by the way. The highest setting will eat batteries like candy, so be sure to bring extra.

On high, the batteries will last you only about 3.5 hours. On low (20 lumens), you’ll get about 16 hours.

Red floodlights only (3 lumens) – 72 hrs; White floodlights only (14 lumens) – 35 hours.

Be forewarned: Using the red lights could get you mistaken for a Jawa.

Be forewarned: Using the red lights could get you mistaken for a Jawa.

The downside to this headlamp is the weight. It’s 4.7 ounces. Not exactly the kind of thing a guy who is trying to cut weight where he can would normally be carrying, but I really love the light this thing produces and I don’t want to lose it just to save two or three ounces. Don’t judge me. (But if I can find a Zebralight dirt cheap, the ol’ Switchback may find itself not getting much use. Just sayin’.)

joby-a

joby-d

Secondly, is the lantern. It’s actually a hard plastic case that the headlamp snaps into (with some effort) that lets you fill up a larger space with soft light. ( Kinda like those pictures you see of somebody putting a small flashlight inside an empty plastic milk jug. ) The headlamp snaps into the bottom, then the top of the lantern telescopes out. The bottom of the lantern will fit onto the included tripod and there is also a fold-in hook on top so you can hang this up in your tent, on a nail in a shelter, on a branch, blah blah, you get the picture. However, it’s also a bit heavy. 4.6 ounces. I rarely need to illuminate a large area for several people, so this hardly ever makes it into my backpack.

joby-b

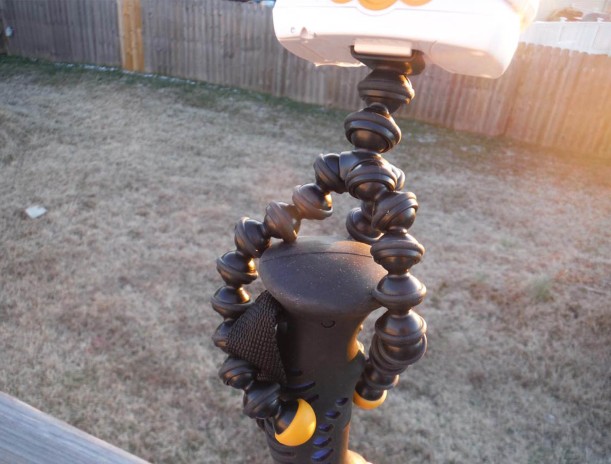
Lastly, there is the GorillaPod (tripod). I like this almost as much as the headlamp, since it goes with me on every trip. The legs of the tripod are super flexible, which lets me wrap them around branches and even the grip of my trekking pole, in case I need to get creative with my photography. I’ve only used small cameras, such as my Fujifilm XP60, so I’m not sure how it’d do with larger DSLR types. ( My guess is that it wouldn’t work that well. ) The tripod is small enough that I can stick it in my pants pocket and carry it without feeling like I’m carrying a brick. Best of all, it’s only 1.7 ounces.

The batteries are housed in a separate compartment that is seated on the back of your head. Both the lamp and the battery compartment are watertight, so if you hike in the rain or if it accidentally drops it into your cup of ramen noodles, you ought to be okay. There is a button for turning on the spotlight and dimming it, and another for turning on the floodlights. There’s also a small battery life indicator light to let you know when you need to install fresh batteries.

The Switchback comes with a 1 year manufacturers warranty. I had a problem with my headlamp, as the snap that keeps the battery compartment shut fell off during a backpacking trip. I sent Joby an email with a picture, explaining the problem and asking if they could send me a new piece to fix it. What they sent me was an entirely new unit. That’s like asking Honda to send me a replacement A/C button and having a new Civic delivered to my house. I have to say, I was pretty pleased with their level of customer service. According to the Joby website, the Switchback has been discontinued, but there’s still plenty of places to buy them at the time of writing this review.

Overall, I think this thing is probably not something most ultra lighters would be interested in, but if you’re not too concerned about an extra 11 ounces (!) and really need something to light up your six person tent so everyone can see all their UNO cards, I’ll recommend this to take care of any and all of your ‘illumination-related needs’.


1 Comment

“Evertime I Shop For Gear…”

400bucks-final

Surely, I can’t be the only person who sees a piece of gear that makes my head spin with gearlust, only to be heartbroken seconds later when I see that it’s light years out of my price range. (Well, assuming I still want to be able to pay my mortgage, anyway.)  I heard a quote a while back that was something like ‘Cutting pounds is cheap, but you’ll go broke cutting ounces.’ And it’s kind of true. I mean, you can go to Dick’s Sporting Goods and get a Eureka! 4 pound solo tent for $100. For $25 more, you can get a 34 ounce solo tent from Six Moon Designs. Do that for your ‘Big 3’ (tent, sleeping bag, backpack) and you can spend a relatively small amount of money and cut several pounds off of your BPW ( that’s base pack weight, to the uninformed). But when you make the decision to start cutting weight on all your gear, every possible ounce, you gotta start switching from an aluminum pot to a titanium pot, from a heavy car camping Coleman air mattress to something like a NeoAir Xlite, from a sil-nylon tent to a cuben fiber shelter, etc. And that’s where you either start spending buckets of cash on new gear or you get used to disappointment. I’m very fortunate that I am able to get free gear from time to time, but so far, a 12 ounce cuben fiber shelter hasn’t shown up on my doorstep, so I just sit, looking out the window, wishing I had $400 I didn’t need so I could go buy one.


Leave a comment

My Primus LiTech TREK kettle

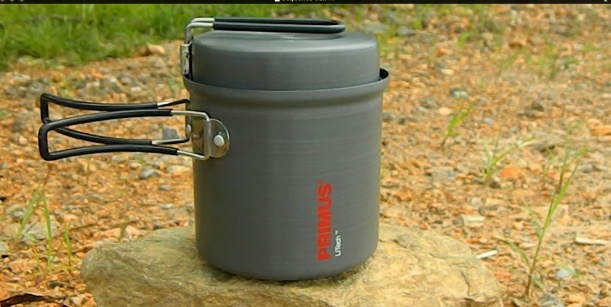
This is the LiTech Trek kettle, from Primus.

prim3333 copy

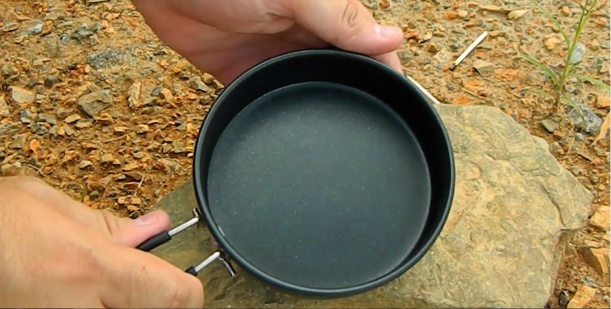
The Trek kettle is the pot/pan combo, (not to be confused with the LiTech kettle, which is best suited for boiling water only. ) The Trek is made of hard anodized aluminum and has a non stick, scratch resistant coating inside. That makes cleaning it a lot easier. You also have a small pour spout to help reduce the risk of spilling stuff everywhere while pouring.  This is  especially helpful when you’re dealing with hot liquids. Spilling boiling water all over yourself while trying to just pour a little into a freezer bag so you can get your Ramen noodles cooked is a whole lot of no fun.

The fold-out handles have  insulated grips, to help prevent you from burning your hands. The kettle will hold up to a liter of water. Also,  the lid functions as a small frying pan. I suppose this would really come in handle if you are cooking pancakes for breakfast, since the pan is sized just perfectly for them.  The pan is 1″ deep, with a diameter of 4-9/16″.  The pot diameter is 4-13/16″ at the top, 4-1/2″ at the bottom and the pot height is 4- 3/8″.

prim1111 copy

Unfortunately, there are no measuring marks on the kettle, so you have to measure out your water with something else. For me, that’s a huge mark against it. I don’t want to have to bring an extra vessel just to measure my water for cooking. The kettle itself weighs in at 6.7 oz, while the lid is 2.6 oz. I’d say that on 99% of my trips, I’d leave  the pan at home. The total weight of the kettle and pan lid is 9.3 oz., so its not the lightest pot of it’s size you can find and likely not the best choice if you consider yourself an ‘ultralighter’. (Unless you’re an ultra lighter on a budget, then you may feel that carrying an extra 3 or 4 ounces is better than spending all that extra $$$ for a titanium pot/pan version.)

It comes in a stuff sack that’s half nylon, half mesh. The stuff sack weighs around a half ounce. (0.6 oz) Although it’s not a huge pot, I was able to fit a 100g Jetboil fuel canister, my Olicamp Vector stove, a small box of matches and a small square of cleaning sponge in there. Also, I noticed that the kettle cools off fairly quickly after use, so you won’t have to wait long before you can pack it and get moving.

prim0000 copy

For me, the bottom line is: it’s a decent pot that won’t break the bank. It’s not as light as a titanium pot of the same size, but also not as expensive. The lid doubling as a small pan is bonus, but the lack of measuring marks is a bit of a buzzkill.

I would probably be more likely to bring the LiTech Kettle on a car camping trip than a backpacking trip, honestly.